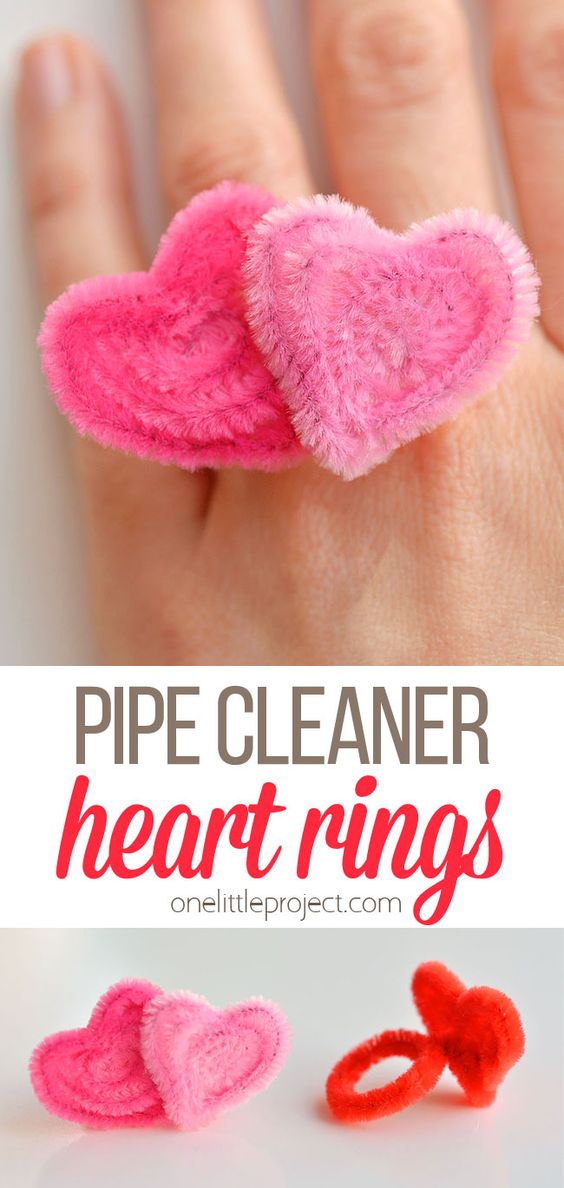
These cute heart rings made with pipe cleaners are SO EASY to make and they’re perfect for Friend’s Day. All you need is pipe cleaners!
- Take the pipe cleaner and place it behind one of your fingers (the one you plan to wear the ring on), leaving about 1.5 inches to the end of the pipe cleaner.
- Wrap the pipe cleaner around your finger. Then twist the end a few times to hold it in place.
- You should have a loop on one end of the pipe cleaner. (Sometimes the loop gets smaller when you twist it. So double check that the loop actually fits your finger before you move on. Adjust the size of the loop if needed.)
- Pinch the end of the pipe cleaner and roll it onto itself to make a spiral.
- Keep rolling the pipe cleaner into a tight spiral until there’s about 1/4 inch of space between the ring loop and the spiral.
- Bend the ring loop backwards so it’s at a 90-degree angle to the spiral. (So, if you put the ring on your finger now, you’d have a spiral on the front of the ring).
- Bend the pipe cleaner to adjust the ring position. Try as best as you can to get the ring loop so it’s behind the middle of the spiral.
- Now you can shape your heart! Pinch the bottom of the spiral to make the bottom V shape of the heart.
- Then press your fingernail into the middle of the top of the spiral to make a bend for the top middle groove of the heart.
- Pinch and bend the sides of the heart until you’re happy with the shape.
If your heart shape tries to unwind when you let go of it, add a small dab of hot glue from the glue gun between the pipe cleaners at the very bottom point of the heart. The little dab of glue really helps the heart keep its shape.
Full project and video at Valentine's Day Heart Rings: Cute Heart Rings from Pipe Cleaners (onelittleproject.com)
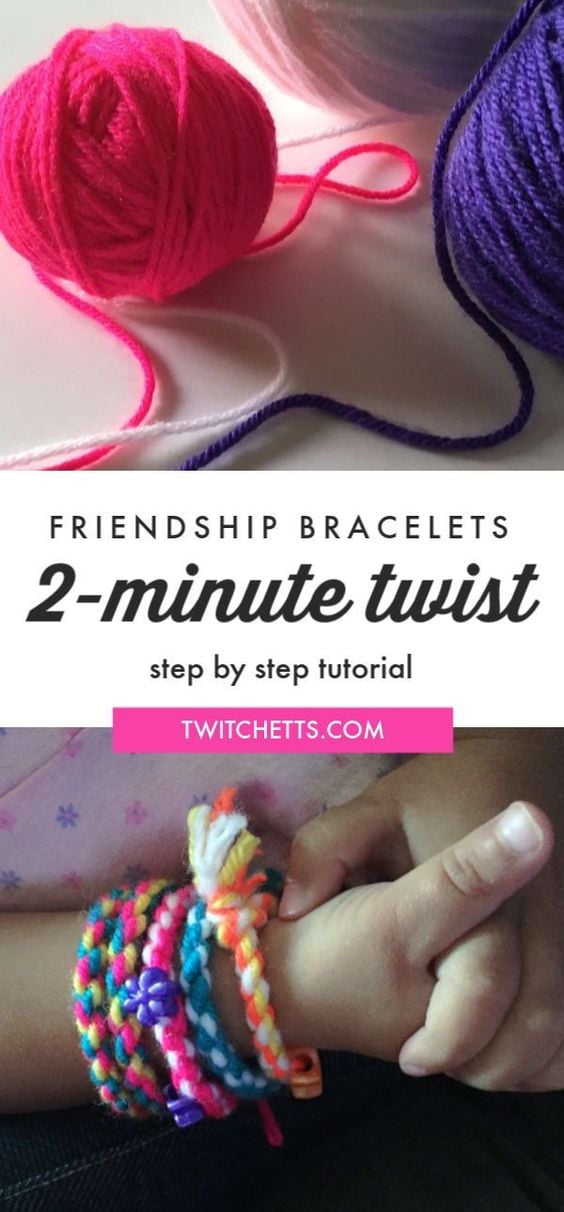
This twisted friendship bracelet can be whipped up in 2 minutes. It is just right for kids as young as preschool to all of their friends.
Creating with yarn promotes:
- fine motor skills
- hand-eye coordination
- following instructions
- teaches colors
- practice counting
- and more!
Tips for making this easy bracelet:
- Picking out the colors of string or yarn is going to take longer than actually creating the bracelet, so let your kids enjoy that process.
- Using yarn is easier for younger kids to handle. If older kids are creating these twisted bracelets, they could easily use embroidery thread.
- Play around with the length of string used. For younger kids, 18″ seems to be a good length.
- Make sure you are using wood or plastic beads. NOT GLASS!
- Stringing the beads through 3 strands of yarn can be a little hard for small fingers. Getting the yarn a little damp, or making a quick tape needle will help ease this process.
What you need:
- yarn
- scissors
- beads (optional but makes it more fun for the older children/teens)
Dollar Tree is my go-to for these items. If you want more choices, Joann's Fabrics is my second favorite, especially with coupons!
Instructions:
- Start by letting your children pick out some yarn and beads. Cut 3 strands of yarn to the desired length. (approximately 18" for preschoolers, you can tell by wrapping the yarn around the child's wrist, and adding an extra inch for extra room while doing the craft)
- Tie all three strands together at one end and tape it down to a flat surface.
- Now take your group of strings and Twist!
- Twist some more...
- You want to keep twisting until your colors look like horizontal stripes.
- If you want to add beads this is the time to do it. String them along the second half of the string.
- With one finger placed in the middle of your twisted yarn, fold the string in half.
- Release the finger holding down the middle.
- Lightly pinch the top and run your fingers down to straighten it out if it’s lumpy.
- Tie together at the top and trim off the extra string.
- To create the bracelet, put one finger in the folded end. Then pull the knot through.
- It will tighten on its own and stay together.
And now you are done! Enjoy your bracelet!
For the full project and video go to this site: How to make a twisted friendship bracelet in 2 minutes - Twitchetts
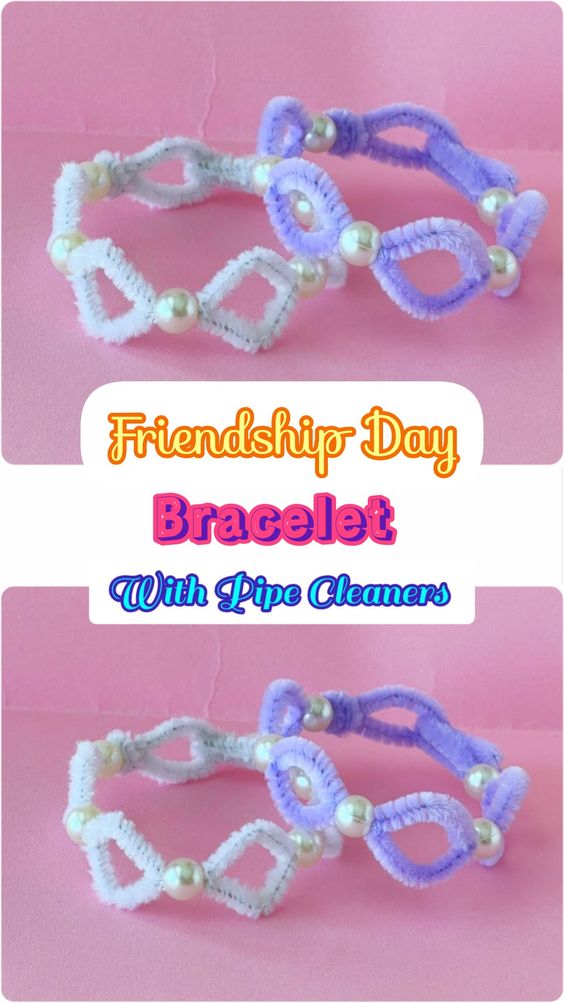
This Pipe cleaner bracelet tutorial doesn’t even include cutting!
Materials:
- Pipe Cleaner
- Beads
- Scissors (optional).
- Glue (optional).
- Pliers.
- Binder pins (optional).
Instructions:
- Take two pipe cleaners of your choice of colors.
- Hold the two ends of the pipe cleaners together and insert your first bead through the two pipe cleaners.
- Keep a 2-3 centimeters gap and insert your second bead.
- Similarly, enter all the beads keeping an equal distance between each bead.
- Now, start spreading the gap between the two pipe cleaners between the beads.
- Take one end of the pipe cleaner and take one strand and make a loop with it. Make a loop and take it back inside the last bead.
- Take the second strand and wrap it around the end of the loop.
- Use something circular shaped to shape your bracelet.
- Insert the other end through the loop.
- Bend it to secure the bracelet.
There you go. Your pipe cleaner bracelet is ready. Wasn’t that absolutely easy? Make a bunch of these bracelets for all of your friends and wish them a happy friendship day.
For the full project, go to: Fun Friendship Day Craft Idea- Pipe Cleaner Bracelets (2 Designs + Video Tutorial - Arty Crafty Bee